Query By Example Guide
Overview
Query by Example (QBE) provides a fill-in-the-blanks interface which automatically generates a native query. There is no need to become an expert in any of the various native querying languages Qarbine supports. The core features of the querying languages are supported. For more advanced queries, use the Data Source Designer which is for free form query authoring.
Prerequisites
Data service configured to access your data. In this example we will access the MongoDB sample store sales data.
Opening the Tool
You can access the Query By Example (QBE) tool in several ways. Tools can be opened from the signOn page, the home page, and from various tools using the hamburger  menu. From the Home tool.
Alternatively you can open the tool from the hamburger menu on each tool.
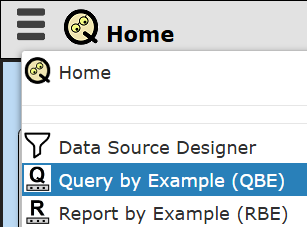
Pressing the control key during the menu click opens the tool in another tab.
Specifying the Data to Query
Select your data service from the dropdown. The Qarbine administrator manages which ones are visible to any particular sign on.

The databases associated with that data service will populate the database dropdown.

The “database” concept varies by the actual cloud data endpoint being interacted with. For example, MongoDB and SQL Server have this concept, while Milvus and Weaviate do not.
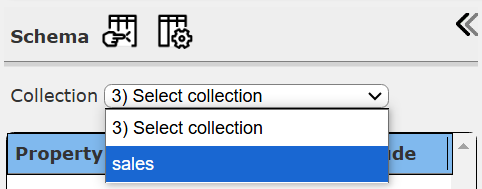
The collections associated with that database will populate the collections dropdown. Select the collection as shown below. “Collections” is the generic Qarbine term. For SQL databases this maps to “tables” for example.
Select a collection from the drop down.
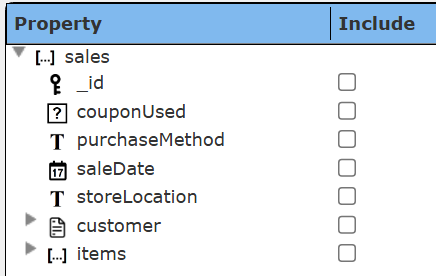
The area below will show the general structure of the collection.
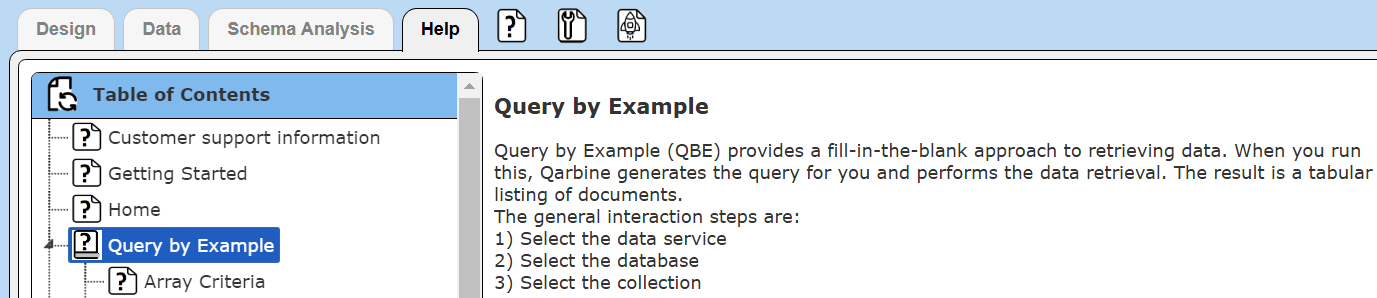
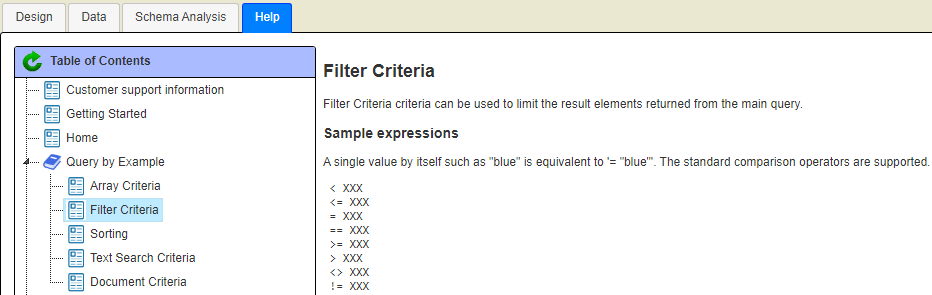
At first the middle area will show some explanatory help information.

Once a field is chosen in the left hand area this middle area will be used to specify query criteria, To see it again choose the Help tab as shown below.
Specifying the Fields of Interest
In many cases you are interested in specific fields with the raw data whether for presentation or criteria purposes.
Select a field from the left hand tree widget.
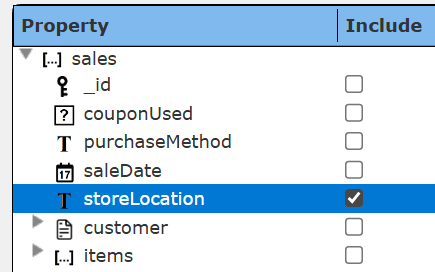
The right side is updated.
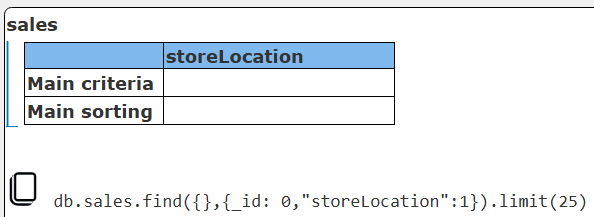
For each selected field the criteria area adds query input fields. As you interact with these widgets the effective query is generated for you and shown for your reference. This is also a convenient way to learn the query syntax of databases.
NOTE- The default number of documents (rows) to retrieve is 25. Adjust this as you become more satisfied with the query and its returned results.
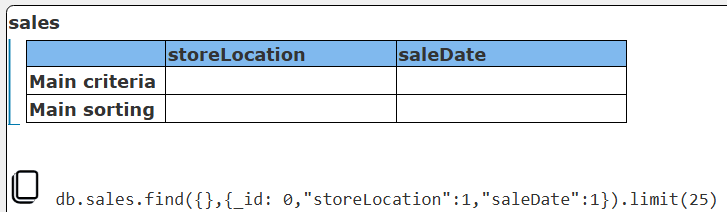
Select the “saleDate” field as well. The query area then shows
You can expand and contract the structure tree information to view the inner fields. These fields can then be selected as well. This is shown below.
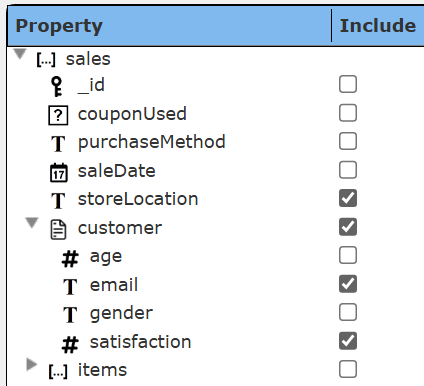
The query area then shows the following.
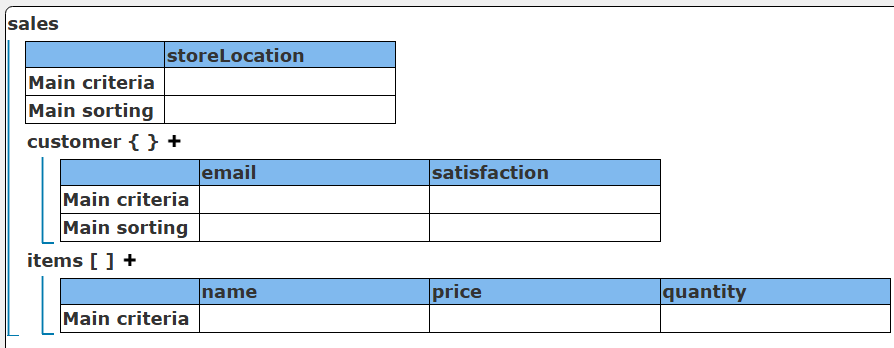
The second set of headings (email and satisfaction) are shown because they are with the “customer” document. Likewise, selecting some of the order items fields as shown below
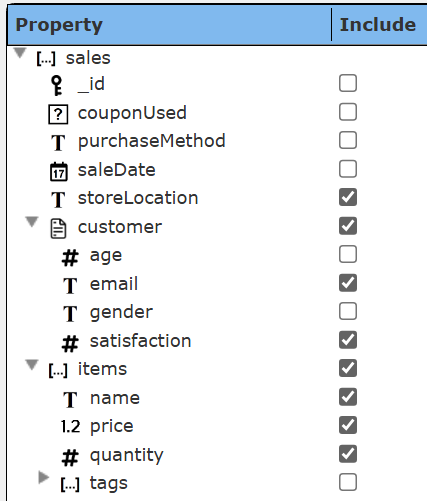
adds another table in the query area.
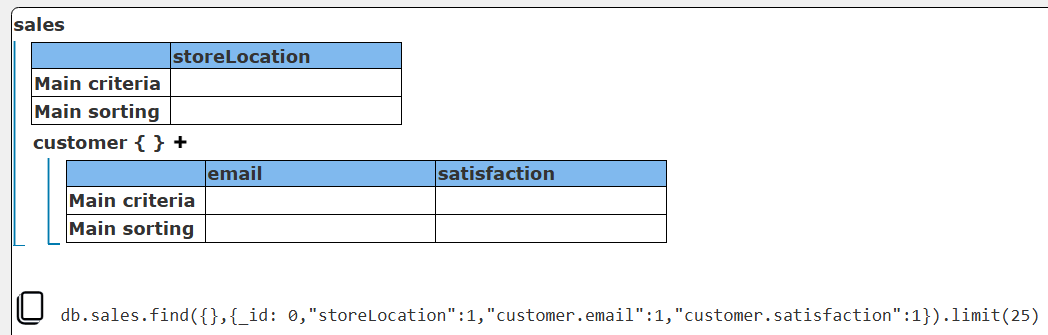
The generated query is shown below.
db.sales.find({},{_id: 0, "storeLocation":1, "customer.email":1, "customer.satisfaction":1,
 "items.name":1, "items.price":1, "items.quantity":1}).limit(25)
Running the Query
Click the run button  to see your initial results.

Note that the active tab was changed to the “Data” tab as shown below.

Click the “Design” tab to get back to the query design content.
For each element in the results the customer value is a document and the items an array. To see the details select the row and the right hand area will be populated.
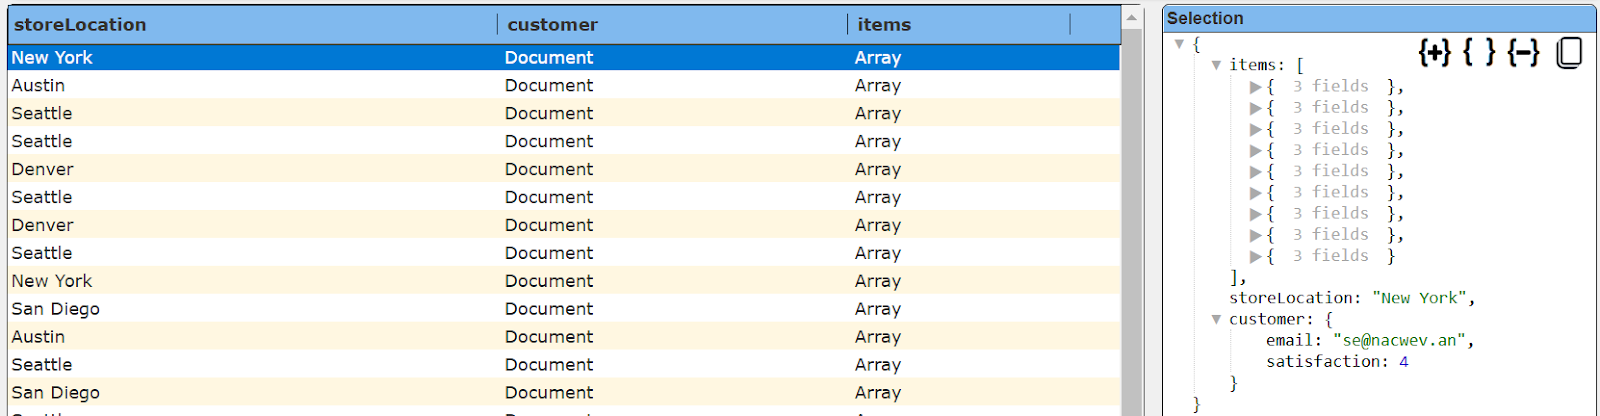
Expand\contract what you see via the tree nodes of the  buttons. Below is one of the order items expanded.

Adding Initial Criteria
Activate the Design tab.

The middle area is used to specify the query criteria in a fill-in-the-blank manner.
Include the salesDate field.

The top of the criteria area shows

Let’s start by limiting the results to sales in Denver. Simply enter “Denver” as shown below.

You’ll see the generated query was automatically updated with the associated criteria.
 ...
...
Next, let’s sort the orders by their sales date.
Mouse over the field.

Click on the  icon to be shown the following dialog.

Choose ascending and click OK.
The entry field is filled in as shown below.

You may also simply type in “ascending” or “asc” into the field as well. The generated query is shown below with the store location and sorting criteria.

Click the run button to see your results.

Date Display and Maximum Element Retrieval Options
Note that the sample data above has sale dates stored as UTC dates. By default dates are shown in the local timezone. To change this presentation click the  button to go to the property dialog.
Check the “ISO UTC” option as shown below.
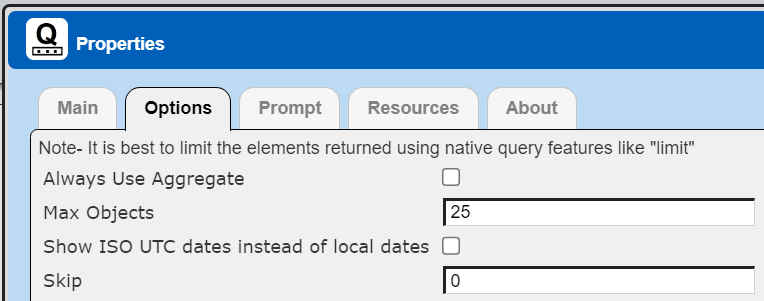
This dialog is also one way you can change the maximum number of elements in the answer set you want processed. It also has a “skip” option to apply to the native query.
Running the query now shows the following.

Additional Criteria Options
There are many fill-in-the-blank criteria options available.They are described in the Help tab content as shown below.
Next Steps
Once you have a result you can then do other actions such as:
 copy it to the clipboard in JSON format.
 view the JSON in another window.
 send it in various formats to a particular destination such as a download folder.