Sample Analysis Template
Overview
The template defines from where to get data and then how the retrieved data is traversed, processed, and presented. For this example we will start off by using the data returned by the Data Source created in this document which retrieves the top 25 movies in 2014. Recall the elements have the following structure.
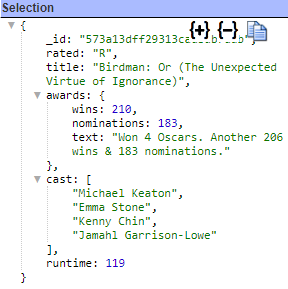
Note the embedded document (awards) and the embedded array (cast). Legacy SQL centric tools would require “unwinding” the cast array which explodes the answer set. The more embedded arrays the more permutation data explosions are necessary. The cartesian product of these becomes unwieldy. In contrast, Qarbine process the elements in their natural, rich object form- no unwinding is necessary.
Walkthrough
Opening the Template Designer
The Template Designer can be accessed in several ways including:
- from the sign on page

- from another tool’s upper left menu.

. . .

Setting the Main Data Loop
You set up the template’s main data retrieval which returns a list of objects. The template indicates how to loop through those objects. If an object has an embedded array then the template will have a “group” which specifies how to iterate through that inner data. While this iteration is occurring your cell formulas are being evaluated and result values are being formatted.
After opening the Template Designer click  to set the template’s properties.
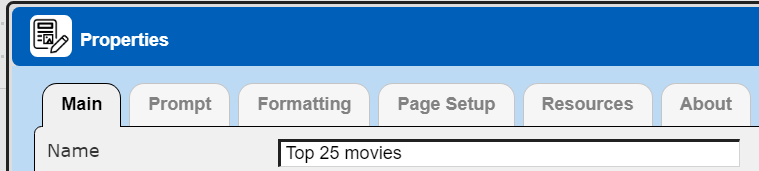
Set its name as shown below.
Set main data retrieval to the sample data source. It is likely one of your recent Data Sources so you can click the  icon noted below.

In the dialog select the save data source.

Click

The main data component reference is filled in as shown below.

We are also going to name the variable set when we iterate through this list. This is useful when writing formulas when there are embedded arrays in play.

To close the properties dialog click
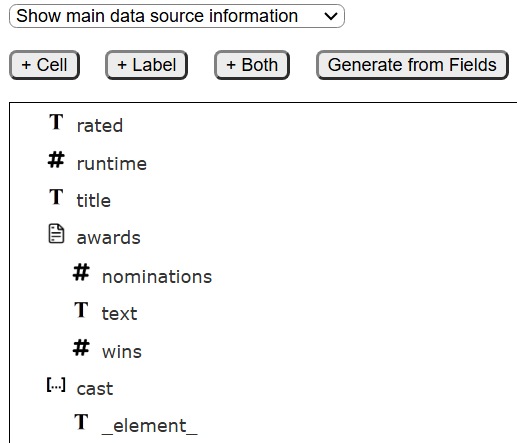
The right hand side of the Template Designer then displays information about the main data as shown below. This is useful when designing your template.
General Template Structure
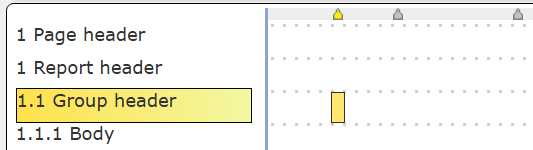
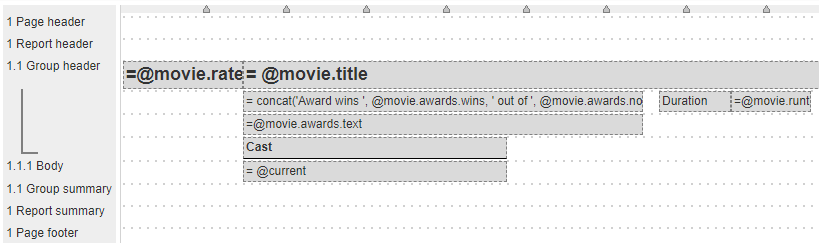
The general structure of the template is presented like an outline.

The report header appears once at the beginning of the analysis while the report summary appears once at the end. Page headers and footers are optional and, just like in Microsoft Word, appear as many times as there are pages. Groups provide the mechanism to loop through lists of objects. Templates can have any number of groups and groups can, in turn, have inner groups. This flexibility is needed to handle the diverse data structures of modern data.
Main Data Loop
The associated Data Source we set above is going to provide the list of sales to be iterated through by its inner groups. Qrbine supports not just nested groups, but also peer groups such as when an object has multiple embedded arrays.
Handling the Embedded Array
There is going to be a second data loop in this analysis because of the embedded cast array. The cast elements will be formatted in the body section. The elements are just simple strings and not any object structure.
To define the first cell click the mouse to the right of the “1.1 Group header” to indicate the starting cell position.
“Cells” are similar to Excel cells in that they have a formula and formatting parameters. They can be placed at various character positions on the lines and need not be strictly columnar as shown above. Once the starting position is set, enter the formula in the entry field as highlighted below and press the enter key.
Below is the formula for the single word “Cast”. It is a simple label and labels with multiple words need to be quoted.

Click the position below it on the first body line.

Enter the formula “= @current”. The “@” sign indicates a variable and the “current” variable is one automatically set by Qarbine during processing.
The layout now looks like the following.

Select both of the cells by left clicking the first and control-left clicking the second. Cell widths can be set in several manners. The easiest way is to type in the desired width in the entry field or simply click on the width arrows as noted below.

In the formula entry field enter “= @current”. At this point we may have the following 2 cells.

Another quick way to widen a cell is to press the control key and click the left mouse button at the desired right-most position.
Examples of formulas with a variable results are “fullName = concat(#firstName, ‘ ‘, #lastName)” and “cost= #price * #quantity”. Other cell formulas can then refer to this variable such as “salesTaxAmount= @cost * 1.06” and then “totalCost = @cost + @salesTaxAmount”. Qarbine formulas are much easier to understand than standard Excel formulas which simply refer to ambiguous cell locations.
We are next going to underline the “Cast” header by selecting it

and then in the right hand area clicking the black line shown.

Bold the heading by clicking on  .
.
To loop through the cast elements in the body select the “1,1 Group header”, right click, and choose “Group properties”.

. . .

Change the inner data option from

to

Recall the movie variable is the current movie element from the main retrieval loop and it has a “cast” field containing a list of cast members. Also check the option below.

Close the dialog by clicking

Defining the Main Movie Cells
Add 3 group header lines by selecting the group header.

and then clicking 3 times the add above button

The group header is going to eventually look like the following

Add to the first group header line a cell starting at the far left position (zero) with the following formula
=@movie.rated
The formula accesses the main data loop’s “movie” variable and obtains the value of the “rated” field. Set the cell width to 15.
To its right at position 15 add a cell with the following formula
= @movie.title
The formula accesses the main data loop’s “movie” variable and obtains the value of the “title” field. Set the cell width to 75

Use word wrap formatting by clicking the 4th icon below as shown.

In the left hand area, select that first group header line

Set the default font for all cells on that line to 18 points with the Arial font as shown below.

Our first group header line looks similar to below.

Note the vertical dots separating the two cells. The second cell starts at position 15.

For the 2nd group header line add a cell below the title cell with the following formula and make its width 50.
= concat('Award wins ', @movie.awards.wins, ' out of ', @movie.awards.nominations)
This formula uses one of Qarbine’s 450+ functions to concatenate several values together. It also uses dot notation to obtain the nominations data from the embedded awards object.
To the cell’s right add the runtime duration information by defining a “Duration” label cell and a cell with the formula
=@movie.runtime
The associated line now looks like this.

For the 3rd group header line add a cell with the following formula and make its width 50.
=@movie.awards.text
The overall cells are shown below.
Running the Template
Run the Template by clicking

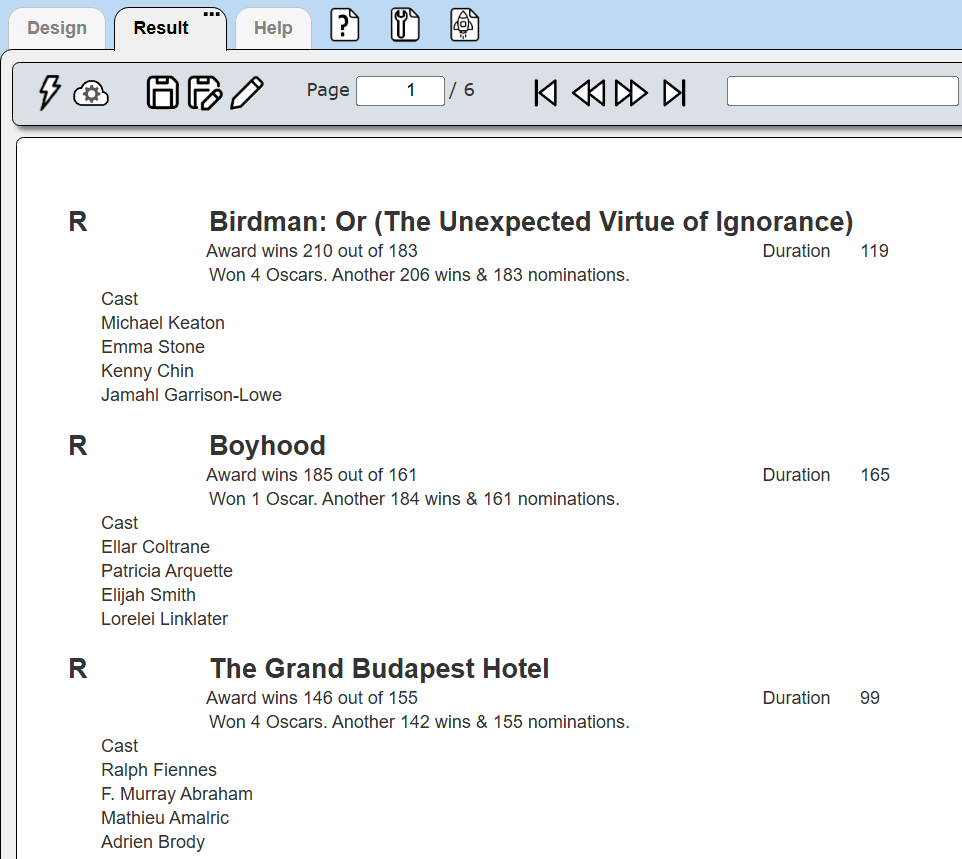
Sample results are shown below.
Saving the Analysis Result
On the Result tab click the icon highlighted below.

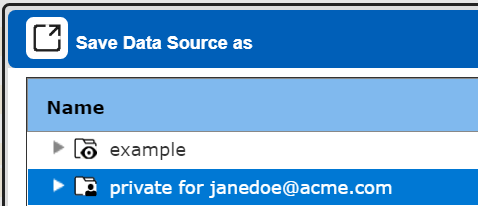
Navigate to your private folder and select it.

The default result name will be the template’s name plus a timestamp as shown below.

Click

Your components can include longer descriptions and tags as well to better convey their purpose and group them in an ad hoc manner independent of their catalog folder location. Users can search the catalog by keywords and tags.
Depending on your Qarbine license and configuration, storage zones can be used to save components and analysis results in appropriate regions to adhere to GDPR or other regulations. The analysis results are more likely to contain data covered under regulations than the templates which are merely referencing field names.
Exporting Results to Other Applications
Qarbine supports a variety of export mechanisms and formats. The Professional version of Qarbine includes support to export to native PDF and Excel formats. This provides a smooth pathway from modern database stored information to traditional office applications. Qarbine’s features can also be called in a RESTful fashion to facilitate workflows without losing the native features of your data servers.
Saving your Template Work
Activate the Design tab.

Click  to save the template.
Navigate to your private folder and select it.
Enter a name as shown below

Click
The template is now saved in the Qarbine catalog. In this example it is in your private folder. OIn other cases you can save the component into a folder that is conditionally accessible by others.
Next Steps
There are many other features of the Template Designer discussed in its own document. It combines the formatting features of Microsoft Word, with Excel-like formulas, and PowerPoint layout features. See the Tools;Template Designer documentation area for details.
For now, return to the “1) Qarbine Sandbox Bucket List” document to continue the quick tour.